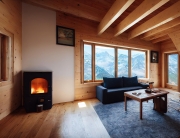
A well-made log home or cabin is breathtakingly beautiful in any setting. You will achieve the desired results by using the best-quality pine log siding, corners, and trims. Real wood log siding looks natural compared to vinyl, cement, or metal log siding. If you want to go green, natural wood tongue and groove log siding with the end-matching design is the way to go.
Four popular profiles are available to meet your aesthetic and budget requirements. Each has its benefits and prices, and you will appreciate their ease of installation. All four profiles are installed the same way and include the following:
- Quarter Log – Available in 2”x6” and 2”x8” sizes
- Half Log – Available in 3”x6” and 3”x8” sizes
- Premier Log – Available in 3”x8” and 3”x10” sizes
- Hand-Hewn Log – Available in all the above profiles and sizes
Pre-finished log siding is available in all four profiles with either an exterior or interior stain.
Log Siding Installation: Before You Start
Once you have selected the profile and placed your order for materials, it is time to make some plans. If this is your first try installing real wood log siding, you will appreciate some guidelines for a professional job. Installing the siding, corners, and trims correctly will also provide your desired authentic log look.
Once the siding, corners, and trims arrive, you should store them in a dry place for a few days to adjust to the climate. Cover the materials with plastic off the ground if exterior storage is necessary to keep them dry.
Log siding is placed on conventionally framed walls of 2×4 or 2×6 studs. Plywood or OSB board should be installed on the framing and wrapped with house wrap or tar paper before the installation begins. Place your choice of insulation in the walls once the siding is installed.
Tools You Need for Log Siding Installation
Typical woodworking tools are all you need for professional log siding installation. You should watch an installation video once or twice before beginning the work. Gather your:
| Tools | Materials |
| Tape Measure | Log Siding, Corners, Trims |
| Carpenter’s Pencil | Screws |
| Miter Saw & Stand | Wood Block |
| Drill & Bits | Oly Log Fasteners |
| Mallet | Nails |
| Nail Gun | Caulk and Gun |
| 6-Foot Level |
Make sure your mitre saw blade is sharp because you will cut a lot of wood. Consult your log siding supplier for the correct size screws and the best type of caulking. Finding a contractor or carpenter for the job should not be difficult if you are uncomfortable installing the siding yourself .
.
“A well-made log home or cabin is breathtakingly beautiful in any setting. By using the best-quality pine log siding, trims, and corners you will achieve the results you desire.”
Begin with the Corners and D-Trim Pieces
Install the corners and D-trim pieces before installing the siding to decrease the overall labour and time significantly. Vertical log corners are the easiest to install, and secure them with ‘Oly Log’ fasteners through the face of the corner into the stud wall behind.
Vertical log corners are notched to fit on a 90-degree corner. A flat surface is found on both sides to accept the log siding. The trim around doors and windows can be secured through the face with an ‘Oly Log’ fastener or toe-nailed/screwed. The log siding mills recommend using a fastener every two to three feet on corners and trims.
Start the Siding with the Bottom Row
Start with the bottom row one piece at a time with the tongue side up. When you reach the end of the first row, see the piece to the correct length. Lay your level on the tongues’ tops to ensure the entire row is level.
 Next, secure the row to the studs with galvanized or stainless steel fasteners. The first or bottom row must be face nailed/screwed along the bottom to secure it. Follow these guidelines for the rest of the wall:
- The top of the first row and all other rows going up the wall only need to be secured through the tongue at a 45-degree angle. The following rows will hide the fasteners.
- Countersink the head of the fastener below the wood’s surface, so the next row fits.
- The end-matching design allows butt joints anywhere between the wall framing.
- The piece you cut at the end of the row will be the starter piece for the next row.
- Keep the end joints randomly staggered as you install the siding up the wall.
The back of the siding has a milled relief cut to allow air to move freely behind it. This design keeps the logs straighter and dryer. Next, follow up with calking and cleaning up the area.
Caulk the Joints and Clean Up
All log siding or entire homes require caulking around the joints where needed. Follow these simple caulking tips for the best results:
- Use caulking to prevent insects from entering the joints
- Use caulking to stop moisture from getting behind the siding
- Using tongue and groove/end-matching siding eliminates 80% of caulking
- The only recommended areas that need caulking with T&G siding are the butt joints that are not tongue and groove or end-matched. This is where the log siding butts into corners and trim pieces.
We hope these log-siding installation tips will be helpful. Hundreds of contractors and homeowners have used these ideas successfully for decades, and you can too!


Recent Comments